The steps for installing a new landscape in Stellarium
are straightforward. It looks like there are a lot of steps
only because I give enough detail that you shouldn't go wrong.
First, download the landscape package file (it's a single ZIP
file, and you don't have to unpack it -- in fact you
shouldn't, though Windows may try to do so.).
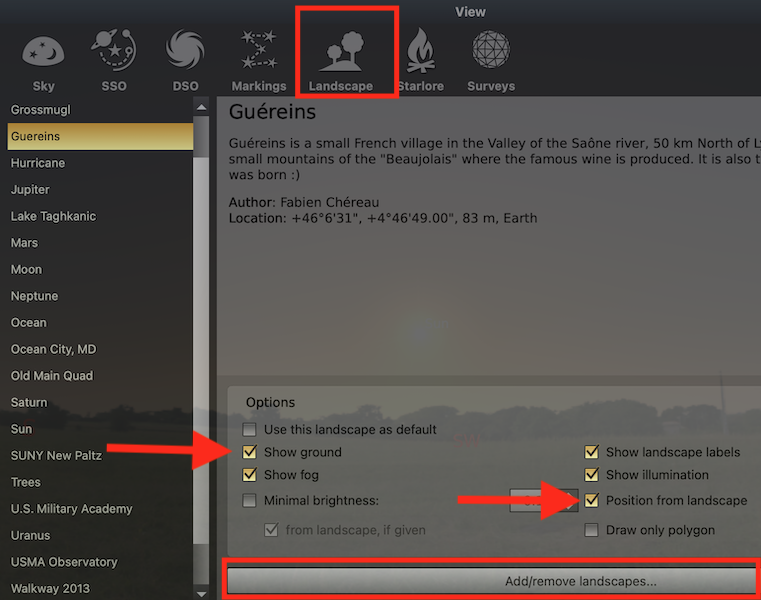
Start Stellarium and open the "Sky & Viewing Options" menu,
either by pressing F4, or by moving the mouse to the left
side of the screen to reveal the sidebar menu and clicking
"Sky & Viewing Options window".
Select the "Landscape" tab along the top, as shown here:
Under "Options", be sure to check both "Show ground" and
"Position from landscape".
Press the button at the bottom labeled "Add/remove
landscapes...", as shown above.
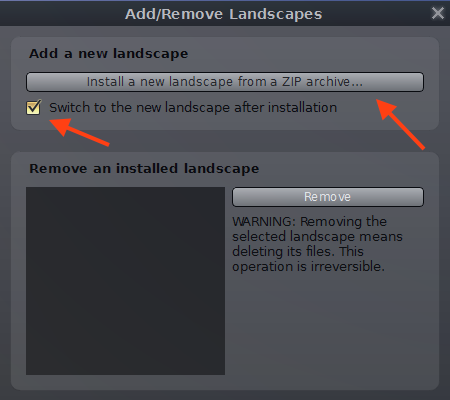
The "Add/Remove Landscapes" menu will appear.
Under "Add a new landscape" check the box for "Switch to the new
landscape after installation", as shown below.
Then press the button
marked "Install a new lansdcape from a ZIP archive..."
Find and select the ZIP file containing the landscape you
downloaded, then press "Open".
The landscape should now be installed.
Press the "×" at the upper right corner of each menu box to
exit that menu.
Before you exit the "Landscape" menu, if you check the box for
"Use this landscape as default" then it will be used
automatically whenever you next use Stellarium.
Troubleshooting: These instructions are for automatic
installation of landscapes using the newest release of Stellarium.
If it doesn't work, you may have an older version of Stellarium.
If that is the case, you can simply update by downloading and
installing the latest version of Stellarium, from
Stellarium.org
 SPY
HILL
Research
Spy-Hill.net
SPY
HILL
Research
Spy-Hill.net